Tag Archives: DIY

Don’t try this at home…

The thing about living in a small town really close to a little impoverished city (but also close to giant rich cities) is that our libraries suck.  I’m originally from a midwestern state which had a very progressive library system and a whooping budget to support it.  When I moved to my old city, it was full of incredibly beautiful library buildings, but so-so collections.  Here?  The buildings suck and the collections are downright pathetic.  (Our town’s library is a nice little old space though).  But that also means books aren’t thrown away or checked out often, so N was able to bring home a mother lode of decorating books from the late 1940s and early 1950s.

I dove in looking for period-appropriate color guidance and decorating ideas for our house of the era.

I’m all for creative re-use and never discarding something until it is truly and utterly useless.

I like old sh*t and prefer to own things that existed before me.

I don’t like fine antiques that need to be minded and not often used in my own living spaces, yet I know not everything belongs in a museum.

But this?

furniture ideas-surgery

Good god, it makes me cringe.

furniture ideas-hack

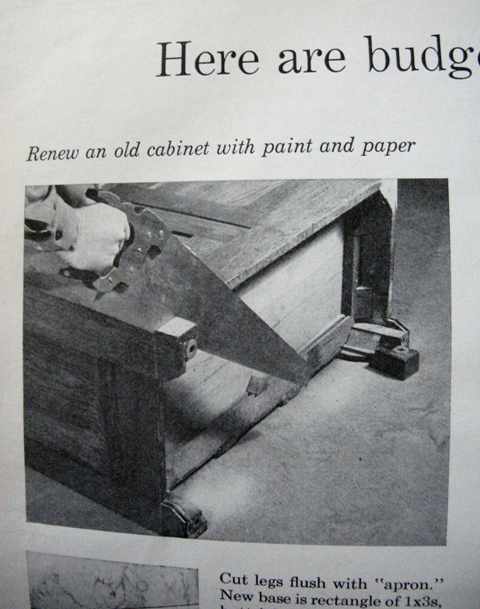
Maybe I should put it into perspective – I’d gladly hack apart something from the 1980s because to me it isn’t old and there is still plenty of it around…. so that’s probably how someone felt about their 30-year-old furniture in the 1940s.   However most of what we had 30 years ago is total sh*t and made from particle board and other unhackapartable things…

I should pause before I go into a very long-winded rant and sob story about a lovely old apartment I once inhabited with built-in cabinets, a lovely and still perfect deep cast-iron enameled bathtub, and solid and well-patinated hardwood floors only to have it entirely gutted by a new owner who wanted to make it “nice.”  It wasn’t – she made it all beige and full of synthetics and she should have been thrown in some sort of prison for her destruction and wastefulness and lack of any amount of aesthetic sense.

Too many DIYers and paid “designers” are ruining the souls and characters of our old homes.

Our house isn’t that old, it’s from the 1950s, and a style I thought I’d never live in and don’t love, yet I’m keeping the good useful parts as they are, and I’m looking at ideas from the era to keep it from becoming too disjointed from its past (hence my dilemma over the knotty pine paneling)  I feel that the original owner (yes even a phantasmic one) should walk into a home and see some familiar elements.

furniture ideas-distance

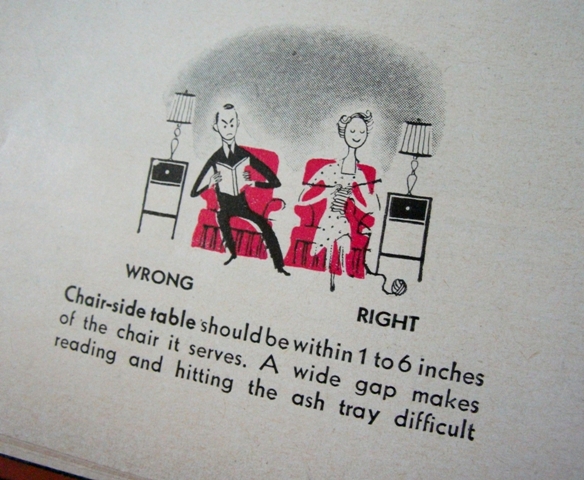
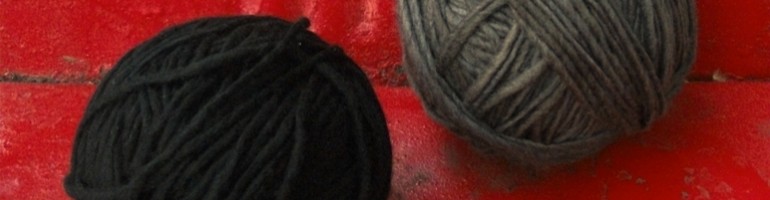
I found a few useful tips I could agree with though – I love a close lamp (and you certainly wouldn’t want to singe your yarn…)

2 Comments

Filed under home, home decor, recycling

A sink hole…

We’re at that point in the house work where we’re finally seeing progress and remarkable change, but feeling utterly exhausted and in all kinds of pain.

I miss knitting a little in the evenings, but I just can’t do anything remotely detail-oriented or delicate with my hands at the moment.

plaster hand

And despite a daily shower, I still carry with me some of the wall colors.

paint arm

But the painful parts are often unexpected and are the main factor to curtail any leisurely handiwork.

ikea bruise

Our weeks-long back ordered kitchen sink finally arrived and we installed it immediately (and oh so securely) only to find it was defective.  The drain hole was more oval than round.  We called the big blue and yellow Swedish store and complained.  They said they were already made aware that a batch of them were defective and the new ones (also back ordered) likely would be as well.

I’m tired of doing dishes in the bathroom sink.  I got through the first day or two pretending to live in a seedy flophouse full of beat-down musicians and washed-up artists, then felt thanks that my ancestors were the tenement dwellers and not me (not yet).

ikea sink hole

So I tore that Domsjo a new one.

ikea oval sink hole

 After more than an hour of aggressive filing, and several bruises later, the hole became round enough.

(In the end, we still had to call a plumber to hook it up, thanks to the previous owner’s pipe-y hacks.)

I’m thinking how I’d like to put the previous owner and a certain blue and yellow big store in a sink hole right about now…

4 Comments

Filed under home, home decor

How not to finish a quilt in 10 easy steps

1.  Ignore the fact that your diet is consisting of more and more mutant produce and get to work.

not1

2.  Plan a queen-sized quilt when you don’t have a queen-sized area in which to work.  Alternately, plan a queen-sized quilt when you bought a house with a big studio, but the sale wasn’t final.  Alternately, continue with said queen-sized quilt when you could have easily scaled back.

not2

3.  [Sidestep] While struggling with the space issue, contemplate the boxes and boxes of books hidden beneath Indian bedspreads (that once adorned dorm walls), pictures without walls, and the weak light from the single window in your sh*tty apartment living room.

4.  Focus your attention back to the quilt top.  Realize that though you usually have a fairly high tolerance for wonkiness, one square looks too sloppy, so carefully rip it out to fix it without thinking about the possibility of how your “fix” might not make it better, only worse.  Feel sad that it could have just been a little extra wonky instead of a lot extra wonky now since there’s no way you’re going back in there to fix/mess it up even more.

not3

5.  When ironing the top (hopefully for the last time) discover that one of the fabrics can actually shrink and warp once it’s already been ironed many many times.  No time for flailing about and shrieking WTFs, just rip the bitches, replace them, and re-iron the whole thing c-a-r-e-f-u-l-l-y.

not4

6.  [Sidestep]  In anticipation of quilting, play with a few samples of top+batting+backing.  Discover that your machine is entirely rejecting this action and refuses to obey proper tension.  Feel immediately panicked, then feel immediately in denial and move on.

7.  Discover that it will be impossible to lay and smooth out the layers flat.  Even if you hop from chair to sofa, you will never be able to perform the long jump necessary from end to end and will fall several times trying.

not5

8.  Consider crying.

9.  Investigate paying someone else to do this part.

10.  Consider scrapping the whole thing.

4 Comments

Filed under home decor, quilts, sewing

An improved jacket

Lately I’ve been re-working woolen clothes – both my own old ones and new thrift shop scores.  Or rather, I have an overflowing box of items I intend to re-work, but have only managed to completely finish a few lately.  I found this jacket or blazer  in early January and it perfectly matches a scarf* I made a few years ago.  And yes, I previously raged against pink a little when it falls under a raspberry or pepto influence, but I love this dirty old lavender-ish rose.

DSCF7106 - Copy

The jacket had some issues though – the plastic buttons looked wrong and cheap and were probably a replacement, there was a large hole in the bottom hem, the sleeves were hack-hemmed way too short, and at first I liked the little brown triangles at the pockets because I thought they were suede and I like mixing browns and greys thank you very much, but on closer inspection they turned out to be Ultrasuede or other sort of microfiber… ick.   And then the label puzzled me as well:

DSCF7109 - Copy

It looks like an older style, but the little content tag underneath it looks more recent, but the sizing is oldschool too – says it’s a 14, but fits more like a 4 or 6 – or is it foreign?  I can’t find anything online about Ms. Alice Carol except a few other pieces [mis-dated in my opinion] on Etsy, so my best guess is that it’s from the late 1970s…?  I also feel that it was sufficiently altered from its original state so I could continue to monkey around with it.  It doesn’t look like I did much now, but I:

let out the cuffs to the bitter end removed the sleeve buttons stitched up the side wrist gap re-hemmed the cuffs re-attached the sleeve lining repaired the hole on the bottom took off the Ultrasuede triangles cut new grey wool triangles but then didn’t like they way they looked and didn’t feel like sewing them on then made and attached my own covered buttons** out of a pair of my brother’s old grey wool pants of about the same age that match the grey stripe that you really don’t see in the pictures [did you get that in one breath?]

Much better.

DSCF7145 - Copy

* For those who are savvy or nebbie, you could find this scarf pattern for free on ravelry, but I’m in the middle of re-writing and charting it and hope to re-post it soon as a buy-it pattern (never mind that only very few have made it for free so far) but one can hope [or have the right to have delusions] right?

** Oh how I love you, DIY button blanks – why were you waiting so long to come into my life?  Will I ever tire of you?  But have you been in my life long enough to know that you’ll hold up through many unbuttonings and buttonings and banging into things?

Leave a comment

Filed under recycling, sewing, thrifting